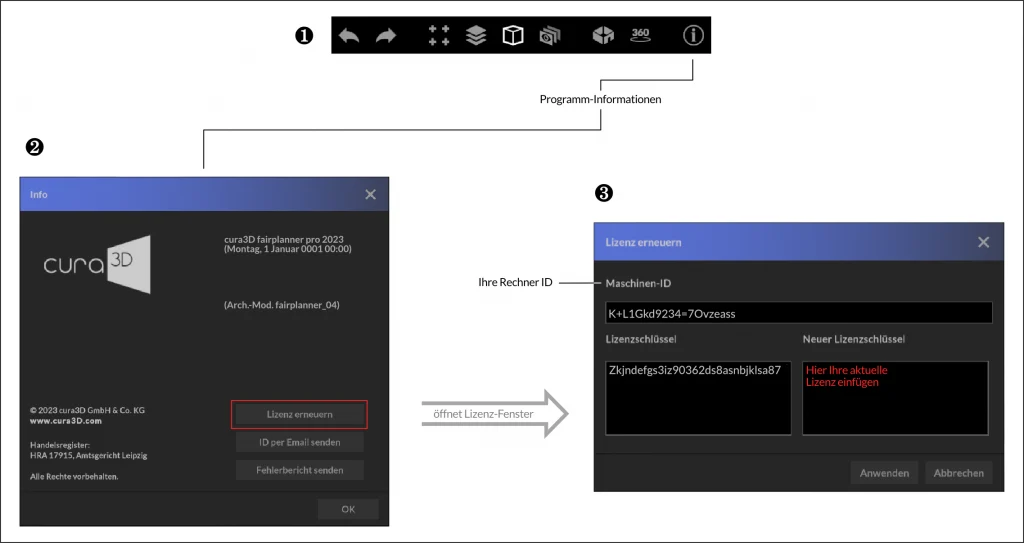
When you start our software for the first time, the “Program Info” window ❷ will open automatically and you will be prompted to enter your license key ❸ to unlock the software.
For this process, you absolutely need an Internet connection. If you are behind a so-called “proxy” with your computer, you can make these settings for the verification process yourself.
To do this, it is best to contact your responsible administrator or IT representative. Under Settings -> Connection settings you can adjust the proxy information.
Your “ID” is bound to your computer. If you have chosen a single user license (e.g. fairplanner pro), the license key is linked to this ID and can only be used with this computer.
The ID is irrelevant for the use of float licenses.
If you need a new licence key for your activated computer, you will find the hardware ID required for this in the “Program info” window. This window can always be found on the “i” symbol of the “Toolbar”, see Figure❶. You can also send us the ID here conveniently via ID by email.
Here you can make basic settings:
If you have purchased the PlugIn to connect to your museum database, you will need to store your access data in the Database Connection section to enable the import of exhibits and collections.
Please feel free to contact our support team for the initial setup.
If you have purchased our plugin InteractiveTour VR, you have received connection data from us, which are to be entered in the appropriate fields to be able to publish virtual tours on the Internet.
The access data should already be filled in with the software installation. If you use a proxy server in your network infrastructure, then ask your local administrator for the connection details. Then check the “Use proxy” box to connect to the proxy server.
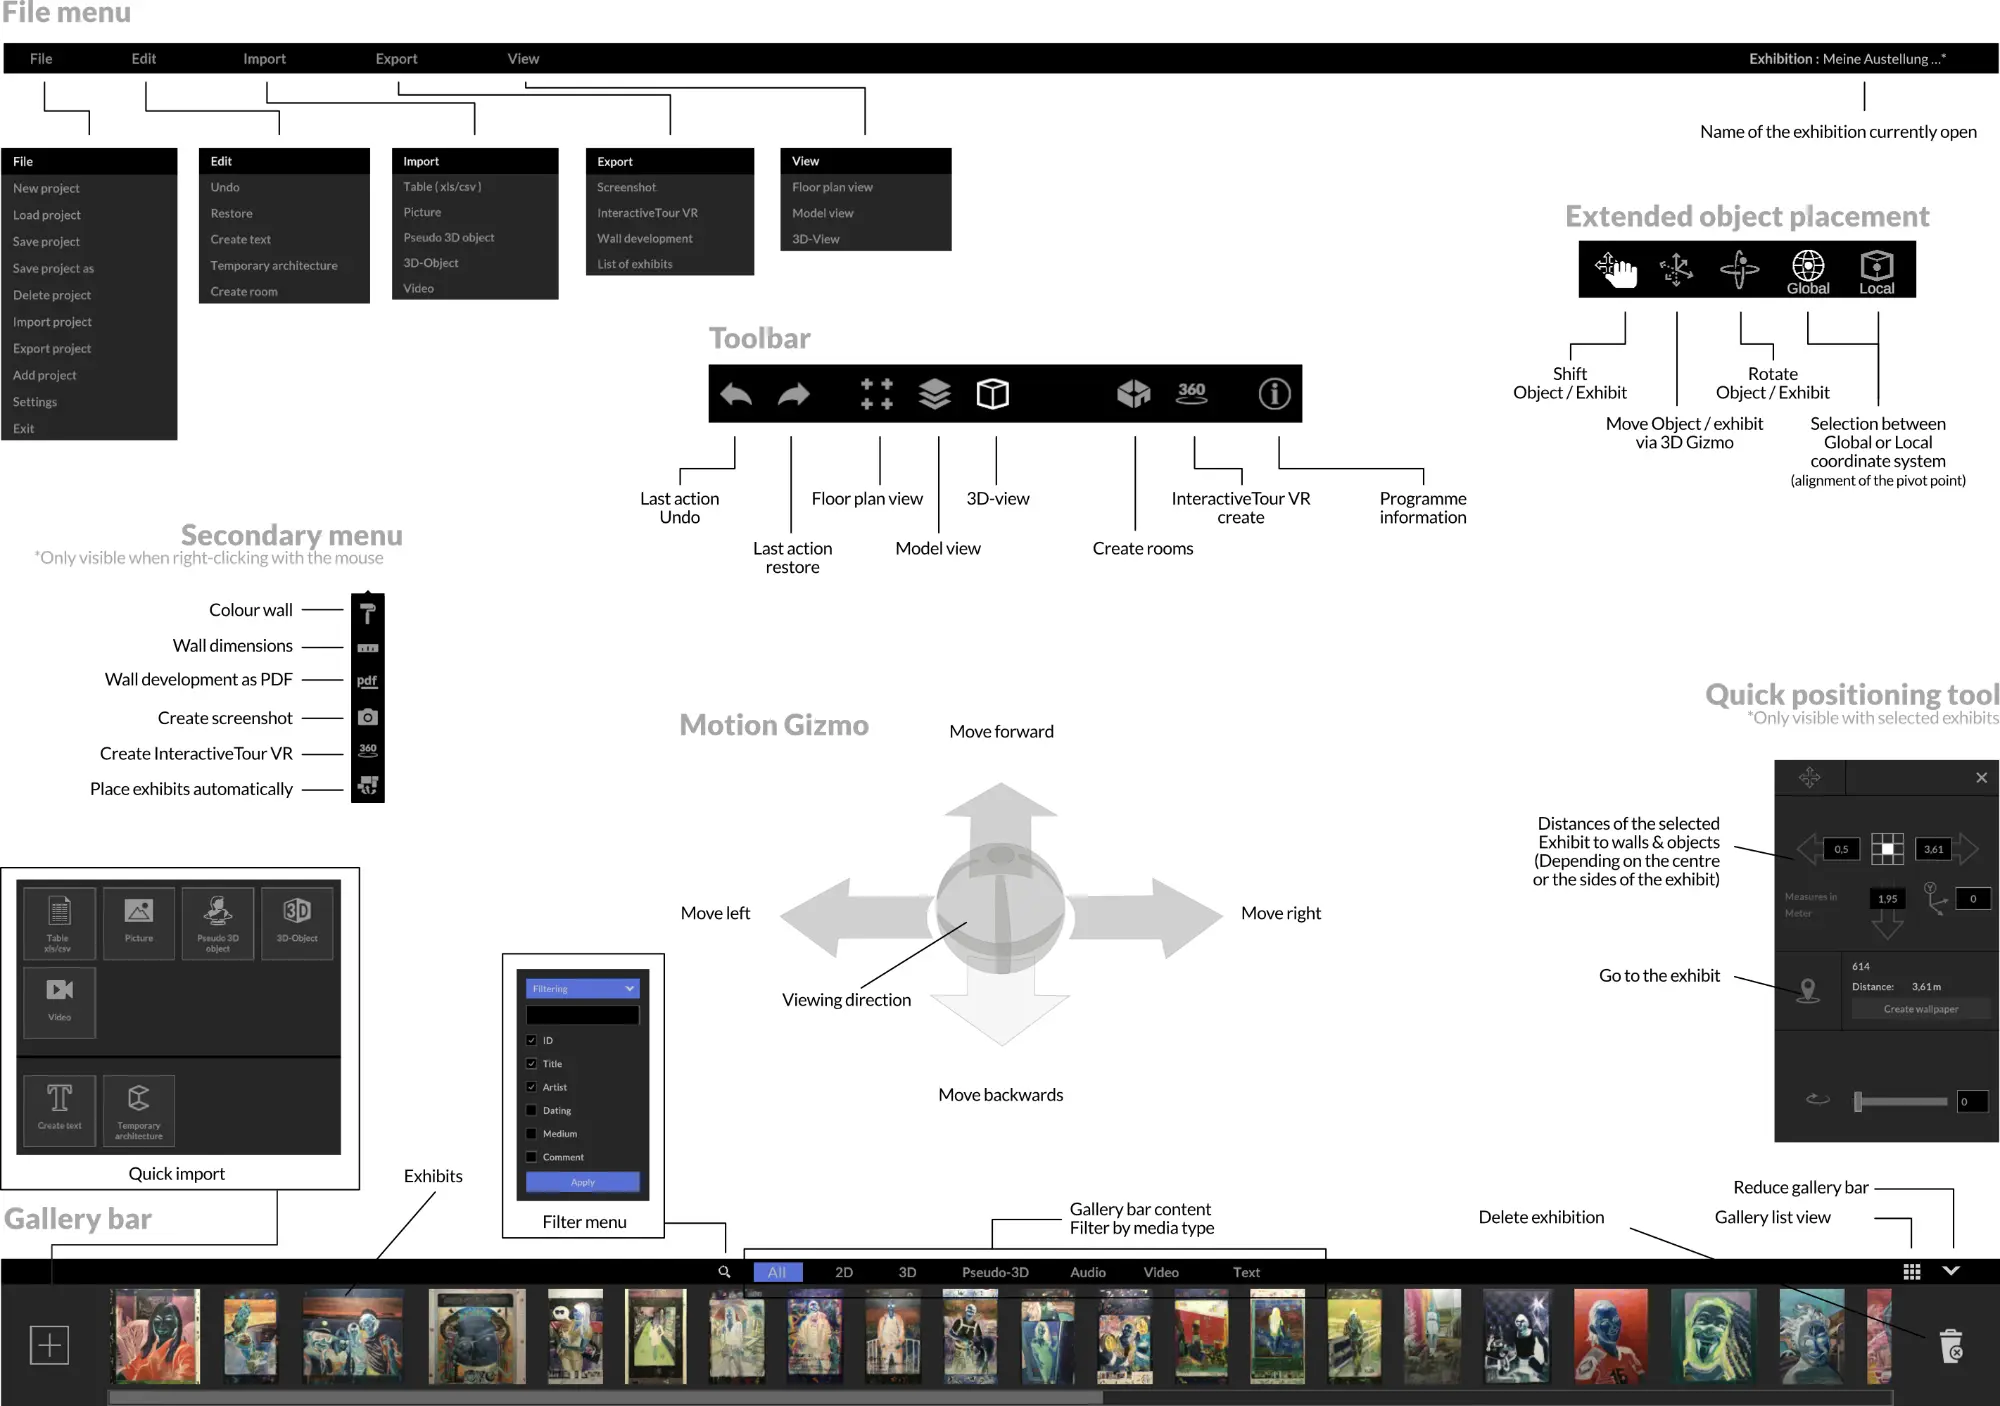
The user interface has been designed so that you can quickly and intuitively find your way around. The interface is divided into three main areas.
The header area contains the text-based “File menu” and the “Toolbar” with the most common program actions.
The middle area is used for planning interaction and is your workspace.
You will find the “Gallery bar” in the lower application area. In this area, the imported exhibits are displayed and selected for placement. Various filter and search options help you to find the desired exhibit in the shortest possible time, even for extensive exhibition projects.
cura3D GmbH & Co. KG
Lützner Straße 102
04177 Leipzig
Germany
E-mail: mail@cura3D.de
Phone: (+49) 341 263 870 66
Mon. till Thu. 10 am – 5 pm
Fri. 10-14h