Exhibits
Import and sift
You can import all exhibits and exhibit lists using the “Import Menu” at the top of the screen or the “Quick Import Menu” at the bottom left of the screen in the “Gallery Bar”.
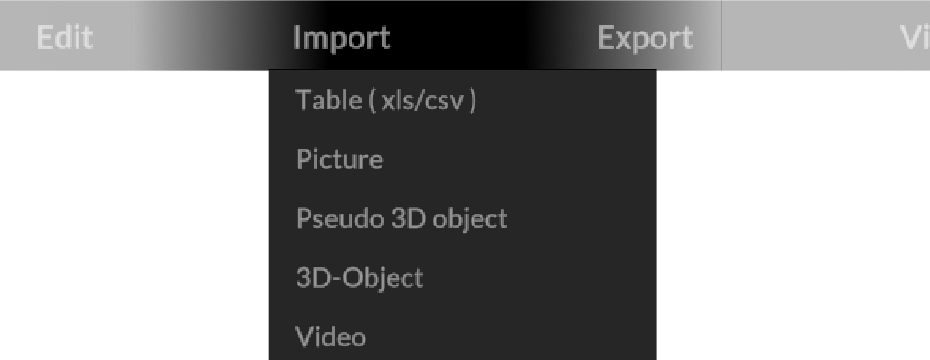
In both menus you will find the possibility to import the following media format and lists:
- 2D images (BMP, JPG, PDF, TIFF, PNG)
- 3D objects (FBX, DAE, OBJ, GLTF)
- Pseudo 3D object (PNG, JPG)
- Video (MP4, OGV)
- Exhibit lists in XLS(X), CSV format
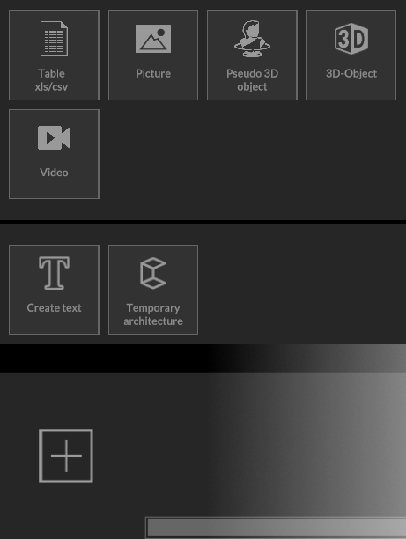
Imported exhibits are initially displayed in the “Gallery Bar” until they have been appropriately placed in the room (wall / floor).
Exhibits
Partial deletion
Partial deletion is a convenient solution that allows you to use a simple menu to select what you want to move back to the gallery bar or what you want to permanently remove from the project.
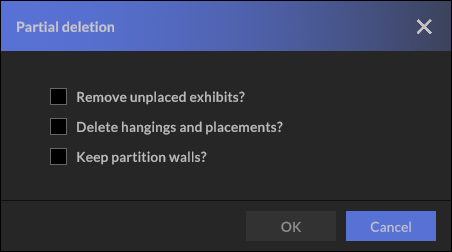
If you only want to remove the unplaced exhibits within the gallery bar, select the corresponding menu item “Remove unplaced exhibits?” as shown in the illustration. All imported exhibits are removed from the gallery bar, regardless of the file type. All exhibits placed within your project remain untouched.
If, on the other hand, you would like to move all placed exhibits on walls and floors etc. back to the gallery bar, select the menu item“Delete hangings and placements?”.
Have you painted walls or used temporary architecture and no longer need it? Select “Keep temporary architecture?” and all wall colors will be set back to white and temporary architecture will be removed.
Note:
If you do not check any of the three boxes and confirm the partial deletion with “OK”, the entire exhibition will be deleted and you will start again with an empty project.
Exhibits
List import (XLS / CSV)
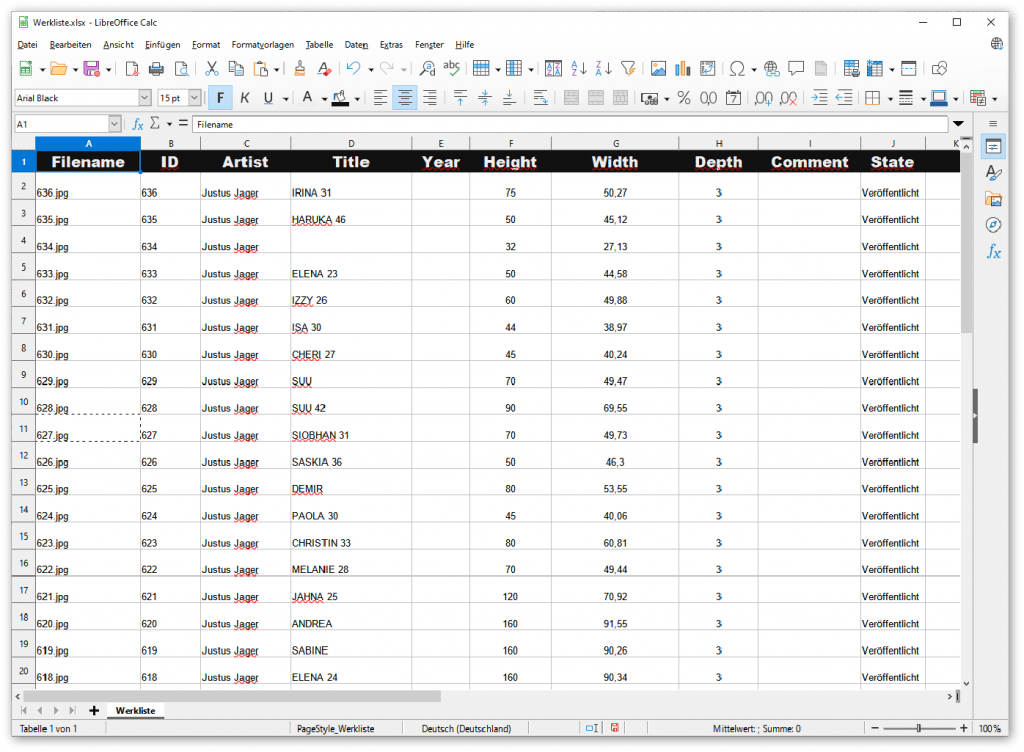
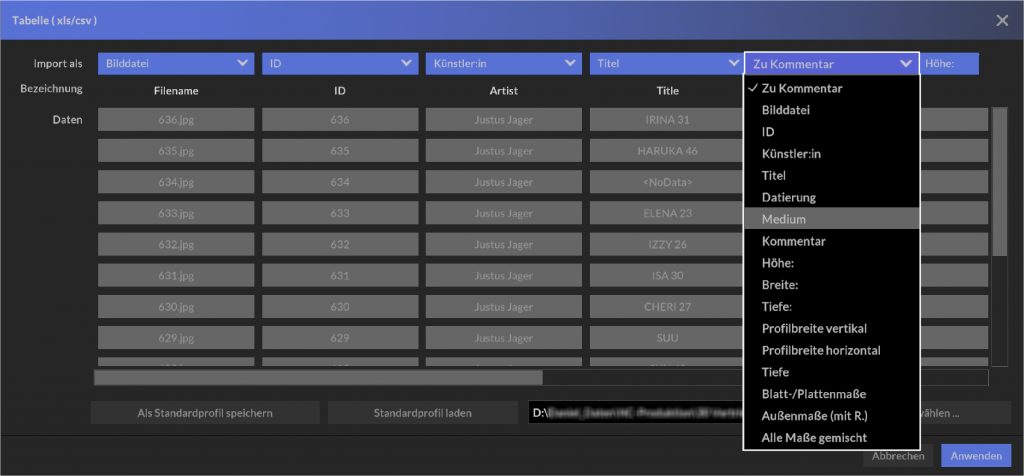
We offer you the option of importing exhibit data in XLS, XLSX or CSV file format.
In the attached screenshot you can see the structure of the sample file used for the import. It is mandatory to specify the image (file) name associated with the exhibit entry. In addition, all associated image files must be located in one folder, which you must select using “Select image path”. Again, you can use both the text-based “File Menu” at the top of the screen and the “Quick Import Menu” at the bottom left of the “Gallery Bar”. If the file has been imported successfully, you only need to assign the correct attributes to the corresponding table column (see figure).
Note:
If your different tables have the same structure, you do not need to reassign the metadata entries each time. To do this, simply select “Save as default profile”. When importing again, you then only need to adjust the image path accordingly.
Exhibits
Placing and positioning
To place an exhibit on a wall, or on the floor, go to the 3D or Model view and drag the exhibit from the gallery bar to the desired location while holding down the left mouse button. Left-click and hold the mouse button to move the exhibit to the desired position.
Note:
If an exhibit cannot be placed in the desired position, please check the dimensions of the exhibit. Simply double-click with the left mouse button on the corresponding work in the gallery bar to call up the detailed view. Under the “Exhibit” tab you can change the dimensions if necessary.
This is especially necessary for different 3D objects, since different coordinate systems and units of measurement can lead to errors, depending on the software used to create them.
Exhibits
Quick positioning tool
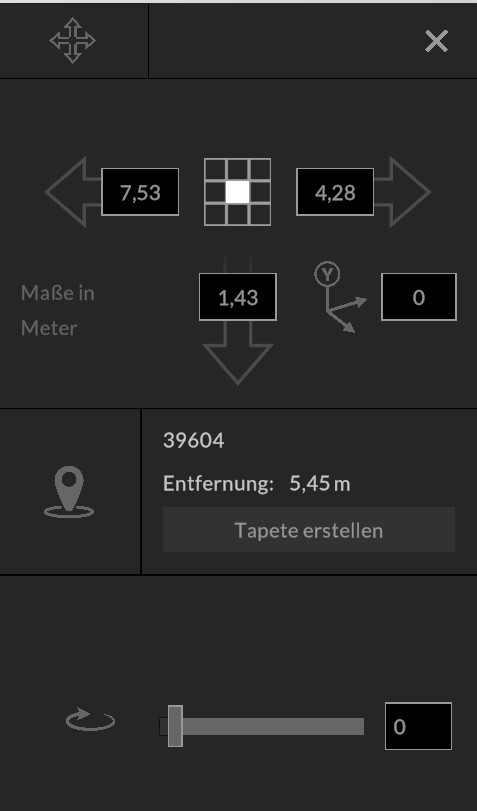
Left-click on an exhibit to open the quick positioning tool. With this tool you can precisely position exhibits and get advanced adjustment options.
The dimensions in the input fields indicate the distance of the exhibit from the outer edges of the wall, or the floor / baseboard. Change the values here to influence the positioning. In the center you will find a “grid field” that contains a total of 10 measurement points. Using these, an exhibit can be aligned very easily, taking into account the top, middle or bottom edge height.
By clicking on the location icon ![]() you move frontally to the selected exhibit, next to it the current distance to the exhibit is displayed. If you want to use imported image files as background graphics (“wallpaper” to click the “Create Wallpaper” button.
you move frontally to the selected exhibit, next to it the current distance to the exhibit is displayed. If you want to use imported image files as background graphics (“wallpaper” to click the “Create Wallpaper” button.
Attention: You cannot select this created graphic with a left click afterwards. To further edit or remove the wallpaper, switch to the dialogue Colour wall (see secondary menu)
Selected 2D exhibits can be rotated around one axis, (pseudo) 3D objects can be rotated on two axes. To rotate the selected exhibit, move the corresponding slider to the right or enter a numerical value (specified in degrees) in the adjacent text field.
Exhibits
3D exhibits
museum pro can import a variety of common 3D file formats. To import 3D data, you can also use the “File menu” or the “Quick import menu”.
After selecting the file in the file manager, the 3D models are loaded into the “gallery bar”. A double click on the respective 3D object in the gallery bar opens the exhibit view. Here you can edit metadata, check or change dimensions.
Note:
If an exhibit cannot be placed in the desired position, please check the dimensions of the exhibit. Simply double-click with the left mouse button on the corresponding work in the gallery bar to call up the detailed view. Under the “Exhibit” tab you can change the dimensions if necessary.
This is especially necessary for different 3D objects, since different coordinate systems and units of measurement can lead to errors, depending on the software used to create them.
Exhibits
Showcases
Configurable and playable showcases are 3D objects created by cura3D especially for museum pro. Exhibits can be placed on the predefined trays.
Note:
If a 3D object cannot be placed in the display case, please check the dimensions of the object.
Exhibits
Pseudo 3D objects
Pseudo 3D objects, or imposters, are ordinary two-dimensional images that can be stood upright and placed on the floor. With the help of an applied transparency in the alpha channel and the possibility to animate the upright 2D image, a spatial visual effect is conveyed to the viewer. To do this, click the “Animate pseudo 3D view” checkbox in the Quick Positioning tool.
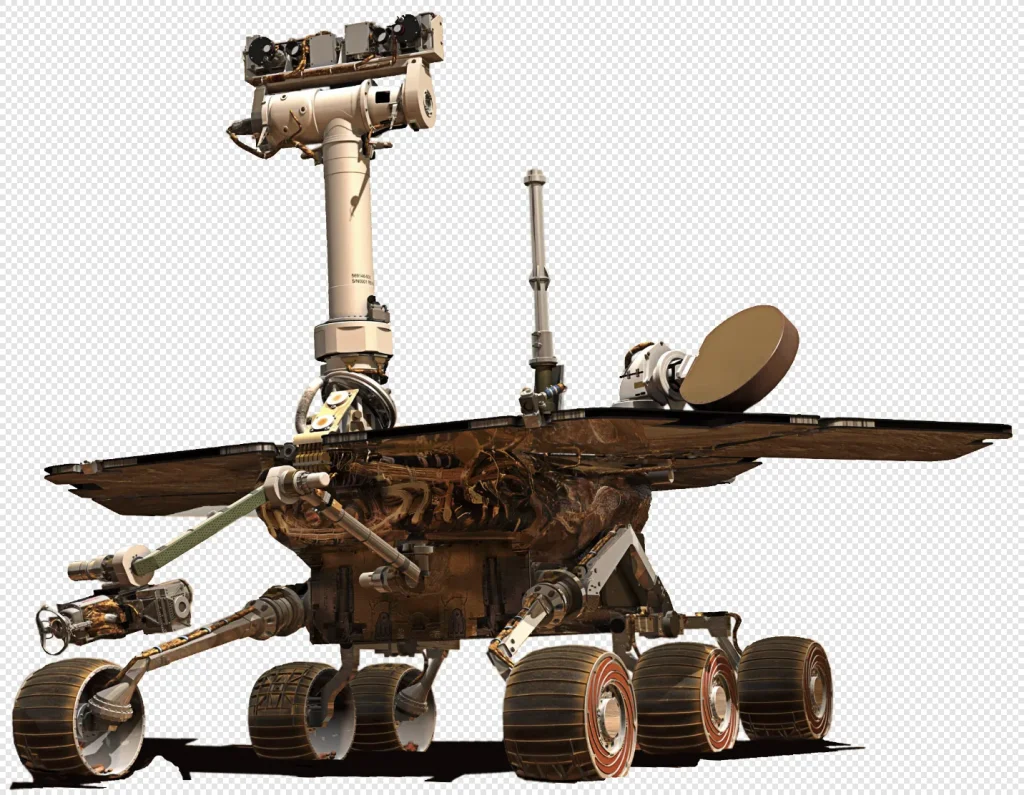
For pseudo 3D objects you need the PNG graphics file format. This graphic format makes it possible to add a so-called alpha channel to cropped images in order to free objects from the background. A correctly cropped graphic can be checked in the common graphic programs, the graphics have a checkerboard pattern instead of a background.
Exhibits
Extended object placement
Move object

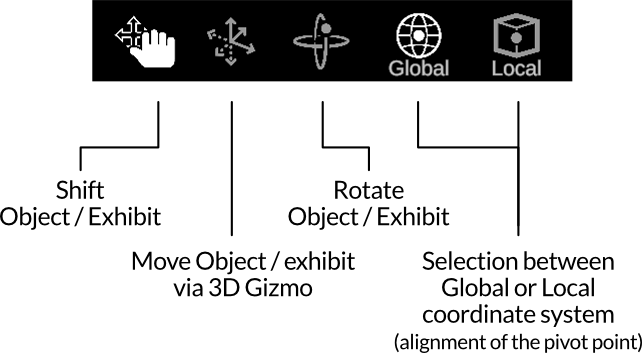
When placing 2D or 3D exhibits, the tool for moving objects is selected by default ![]() . In this mode, you can easily move objects around the room using drag-and-drop, which automatically snap into place on walls, floors and ceilings.
. In this mode, you can easily move objects around the room using drag-and-drop, which automatically snap into place on walls, floors and ceilings.
Move object via 3D gizmo
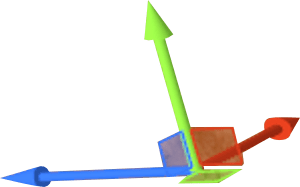
For more precise positioning of objects in space, we recommend using ![]() 3D-Gizmo, which allows you to move your selected object continuously in all axes. To do this, click and drag on one of the colored arrows displayed in the center of your object and move the object in the corresponding axis.
3D-Gizmo, which allows you to move your selected object continuously in all axes. To do this, click and drag on one of the colored arrows displayed in the center of your object and move the object in the corresponding axis.
This mode also allows you to move objects through glass surfaces and walls and to place objects floating in the room.
Rotate object

With the ![]() rotation tool, you can quickly and easily rotate the object in the corresponding axis by clicking and dragging the colored rings.
rotation tool, you can quickly and easily rotate the object in the corresponding axis by clicking and dragging the colored rings.
This tool works closely with the quick positioning tool. Settings that you make here are also displayed using numerical values in the quick positioning tool.
Global or local coordinate system
Global
Local
Sometimes it makes sense to switch from ![]() global to
global to ![]() local coordinate system, especially for objects hanging on the wall.
local coordinate system, especially for objects hanging on the wall.
These two buttons are used to realign the pivot point of your 3D or 2D object.
Exhibits
Exhibit Manager
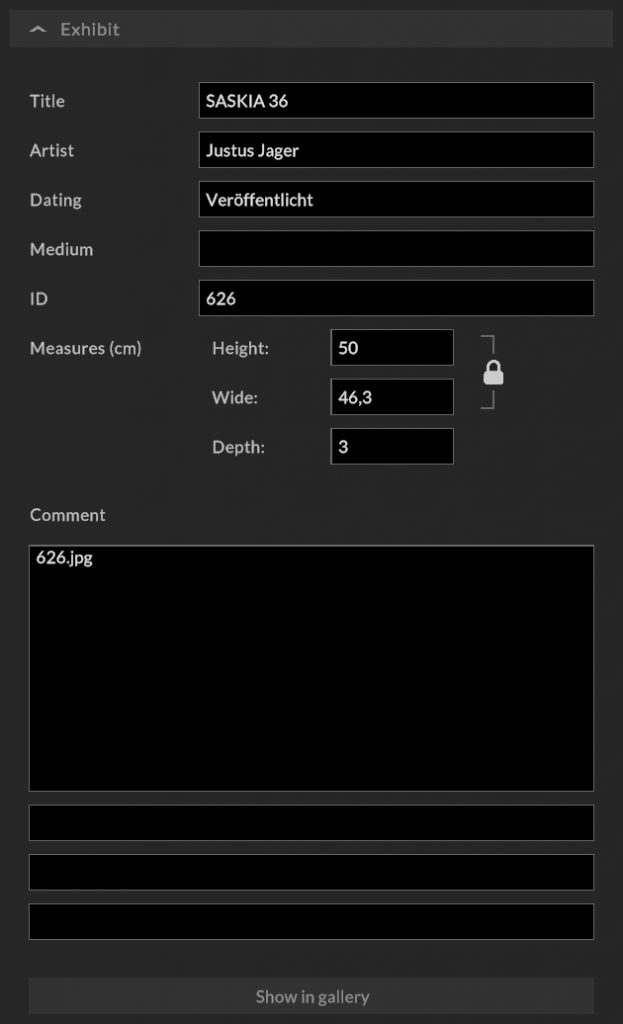
Metadata
Under the tab “Exhibit” you will find all relevant data on the selected work. This metadata is optionally matched and imported from an existing database or from a table in csv or xls format.
You can edit the fields or add additional information at any time.
Note:
If an exhibit (2D / 3D) is too large, it cannot be placed appropriately. In this case, a manual adjustment of the dimensions must be made.
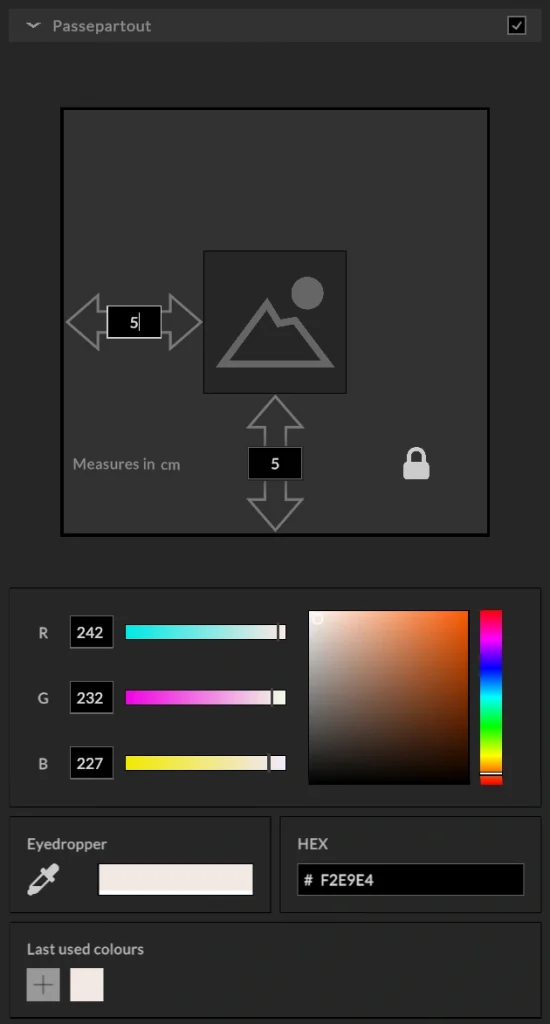
Passepartout
Activate the “Passepartout” check box with a tick and enter the desired dimensions. Via the lock symbol ( activated by default) you link the horizontal and vertical dimension input. If you want to enter different measurement values, deactivate the lock.
Then select the desired color in the color dialog. To do this, use the RGB color settings or take a color from a screen element using the pipette, or enter the hex color value. Under “Last used colors” you can save up to 8 colors by clicking the “+” button and use them in all color dialogs.
Frames
Activate the “Frame” check box. Enter the profile width of the frame and note that the lock icon for the horizontal and vertical profile width is enabled by default (In the rare case of different dimensions for the horizontal and vertical profile width, disable it by clicking).
Use the first frame type to use your own colors, otherwise a selection of different frame types is available.
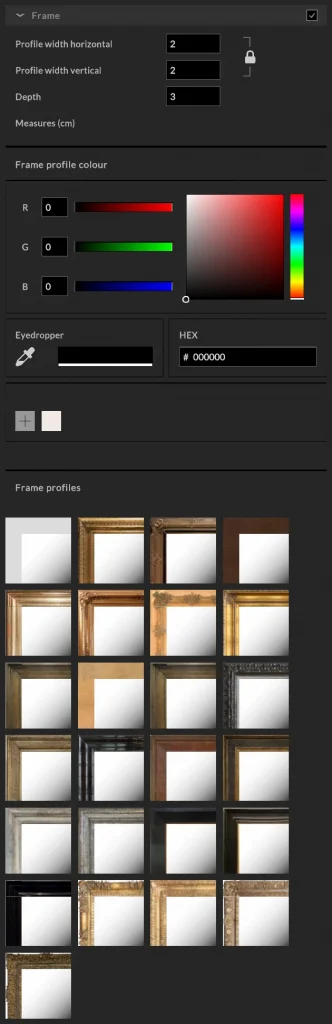
Note:
Selecting a frame from the library may overwrite your color settings, but the profile width remains unaffected.
Exhibits
Sift and sort
List view
The list view provides a quick overview of placed and unplaced exhibits. You can access the listing via the ![]() “Exhibits List” button and additionally sort all exhibits by title, artist:in, ID, wall and room name. Clicking on the work image opens the exhibit manager.
“Exhibits List” button and additionally sort all exhibits by title, artist:in, ID, wall and room name. Clicking on the work image opens the exhibit manager.
Filter exhibits
To specifically search / filter the matching exhibits in the “Gallery Bar” after import, use the ![]() “Filter Menu”.
“Filter Menu”.
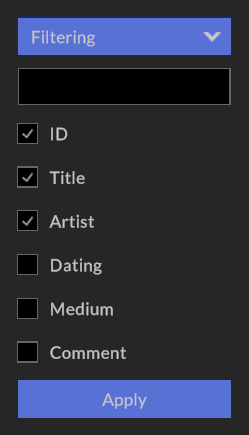
By clicking on the filter icon in the “Gallery Bar” you can filter for the following metadata entries:
- Artist
- Title
- Object ID/Inventory number (ID)
- Dating
- Medium
- Comment
All data fields can be activated and searched simultaneously.
Imported files can also be filtered using the following format criteria:
- All
- 2D
- 3D
- Pseudo-3D
- Video
- Text
Note:
If you would like to export a clear list of your exhibits including metadata for distribution, you can use the XLS file format. The export is done via the menu File / Export / Exhibit list.